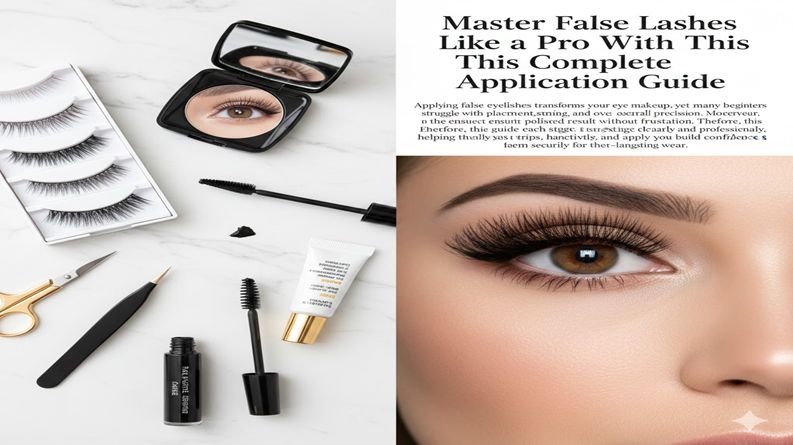

Applying false eyelashes transforms your eye makeup, yet many beginners struggle with placement, glue timing, and overall precision. Moreover, understanding the correct steps ensures a polished result without unnecessary frustration. Therefore, this guide explains each stage clearly and professionally, helping you build confidence and consistency. Consequently, you will learn to prepare your tools, handle lash strips effectively, and apply them securely for long-lasting wear.
1. Prepare Your Eyes and Tools Properly
- Clean and Prime the Eye Area: Start by cleansing your eyelids thoroughly because clean skin helps the adhesive bond better and prevents slipping during placement. Additionally, pat your lids dry carefully before applying primer, ensuring a smooth surface that keeps oil away throughout the day. Consequently, this preparation increases glue durability and supports comfortable wear when your day becomes busy.
- Gather the Essential Tools: Assemble your tools early because organized preparation supports efficient application and reduces mistakes while rushing. Use tweezers, scissors, a lash applicator, black eyeliner, mascara, and a high-quality lash adhesive to guarantee professional results. Furthermore, choose a magnifying mirror with good lighting because clear visibility improves accuracy during placement and trimming significantly.
- Select the Right Lash Style: Choose lashes that complement your eye shape because suitability affects comfort and overall appearance in every situation. Natural wispy lashes suit everyday looks beautifully, while dramatic voluminous styles enhance evening glam effortlessly when you desire stronger definition. Likewise, brown or soft hybrid lashes work perfectly for subtle makeup lovers seeking gentle enhancement without overwhelming their natural features.
2. Shape and Prepare Your Natural Lashes
- Curl Your Natural Lashes: Gently curl your natural lashes because proper lift helps the falsies sit seamlessly along your lash line. Additionally, curling supports a unified look once both lash layers merge, preventing awkward gaps that weaken the desired professional finish. Therefore, spend time curling thoroughly to ensure both eyes achieve matching height and balanced upward direction before continuing application steps.
- Apply a Thin Coat of Mascara: Apply one coat of mascara to create structure because the falsies cling better when supported by defined natural lashes. Moreover, mascara helps blend textures smoothly, allowing the strip to appear natural rather than separate. Consequently, this step enhances overall fullness and minimizes visible layering issues that beginners often experience during their early attempts.
3. Measure and Trim the Lash Strips
- Measure Lash Length Accurately: Hold the lash strip along your lash line because precise measuring ensures comfortable wear without poking your inner or outer corners. Additionally, be patient during this moment since incorrectly sized lashes often lift prematurely and disturb your confidence. Consequently, measuring accurately prevents future issues and supports placement that lasts comfortably throughout long events or busy working days.
- Trim Carefully for a Perfect Fit: Trim the outer end of the strip using small scissors because preserving the inner lash design maintains a natural tapered appearance. Moreover, trim slowly to avoid over-shortening since mistakes here affect symmetry noticeably. Therefore, compare both strips after trimming because consistent length supports balanced results and avoids mismatched lash placement that distracts significantly.
4. Apply Glue and Wait for the Correct Tacky Stage
- Use the Right Amount of Adhesive: Apply a thin, even layer of glue along the lash band because excessive adhesive causes slipping and messy edges. Additionally, focus on coating the corners thoroughly since they often lift first when glue distribution is uneven. Consequently, careful glue application ensures long-lasting wear that withstands blinking, humidity, and movement without compromising comfort.
- Allow the Glue to Become Tacky: Wait 30 seconds for the adhesive to become tacky because immediate placement causes sliding and weak bonding. Moreover, tackiness allows the strip to grip precisely on the first attempt, preventing unnecessary repositioning. Therefore, use this short wait time to steady your posture and adjust your mirror angle for the upcoming placement step.
5. Place and Secure the Lash Strip Smoothly
- Position the Strip Accurately: Place the lash strip at the center of your lash line first because starting centrally helps you anchor the position securely. Next, press the inner corner gently since this area requires accuracy to avoid irritation throughout the day. Consequently, secure the outer corner last, ensuring the lash band follows your natural lash curve perfectly and comfortably.
- Blend Natural and False Lashes: Press your natural lashes and falsies together using tweezers because gentle merging creates a unified, seamless finish. Additionally, avoid pressing too hard since excessive force bends the strip and disrupts its shape. Therefore, focus on careful blending because well-merged lashes produce a polished appearance that resembles professional application effortlessly.
6. Perfect the Finish With Eyeliner and Mascara
- Conceal the Lash Band Neatly: Apply a thin line of eyeliner along the lash band because this technique hides any exposed glue or uneven edges. Moreover, eyeliner enhances depth, ensuring your lash line appears uniform and refined. Consequently, this finishing touch elevates the look and supports a clean visual transition from natural lashes to falsies.
- Add a Final Mascara Touch if Desired: Apply a small amount of mascara if you want additional blending because it helps unify the thickness between both lash layers. Additionally, apply lightly since too much mascara overloads the strip and shortens its reusable lifespan. Therefore, use a careful approach to maintain lash integrity while achieving a soft, cohesive blend.
7. Remove and Store Lashes Properly
- Remove Gently With Oil-Based Remover: Use an oil-based remover on a cotton pad because gentle loosening protects your natural lashes from accidental tugging. Moreover, avoid pulling the strip quickly since excessive tension damages delicate lash roots. Consequently, slow removal ensures comfort and supports healthy lash maintenance over time.
- Clean and Store Your Lashes: Clean adhesive residue with tweezers carefully because maintaining hygiene extends the life of your lash pair. Additionally, store your lashes in their original case to preserve shape and protect fibers. Therefore, proper storage guarantees multiple uses and supports consistent quality each time you reapply them.
Conclusion
Mastering false lash application requires patience, proper tools, and practice, yet the technique becomes easy once you understand each structured step. Moreover, consistent practice builds muscle memory quickly, allowing you to apply lashes confidently for any occasion. Ultimately, following this guide helps you achieve beautifully lifted eyes that enhance your overall makeup look professionally and effortlessly.